The Process (How evilchili Makes Dice in 2023)
I've been making resin dice for a few years now. While I enjoy it, the hobby can be really frustrating because the margin for error is very small and the cost of failure in terms of time and materials can be high. I took some time off earlier this year, and when I returned to it I resolved to iterate on my basic process until I had something as de-risked and repeatable as possible, and then document it. This frees me to focus on the fun bits -- namely experimenting with colors, novel materials, additions, and pouring techniques. The result is this guide, which I wrote primarily for myself and originally posted on mastodon, but I decided to expand it and post here.
Warning!
This guide is optimized for consistent, predictable results first, then cost; a trade-off I am fortunate to be able to afford. If you're looking for a "getting started for cheap" guide, this isn't it.
Materials and Equipment
Here's the full list of all the materials and equipment used in this guide.
-
Dice Masters
Pay for a high-quality set of dice masters, and pay well. It will save so much frustration with every set you cast, and while it can be pricey up front, they'll last a very long time. Mine cost me around $150, which was a steal. -
Pressure Pot
Many will tell you this is optional; for me it removes the single biggest point of failure when making both molds and dice; it is essential. I have a 5gallon one, but you can go smaller if you aren't doing batches. -
Pressure Pot Shelving
This actually is optional, but it helps ensure molds are level in the pot. I built mine out of some scrap wood and a couple of cake stand pieces from a crafting store. -
Wax Paper
Cover your shelving to catch silicone and resin spills and keep your shelf both clean and perfectly flat. -
Air Compressor
The pressure pot is useless without one. I optimized for quiet and got a 1-gallon compressor rated for 54db that sits under my work bench. -
PVC couplers
These are plastic plumbing fixtures that come in a variety of sizes. I ended up using 1.5" couplers similar to this one for my 20mm-diameter dice; standard 16mm dice would probably fit well in 1.25". When buying them, be sure to use the internal diameter measurement. -
Book-Binding Tape
This is similar to packing tape, but with two crucial differences: it is 4" wide, and it is thicker than most packing tape. -
Hot Glue Gun
Get one of the small ones for crafting, not the big industrial dealies. Used for sealing molds. -
Self-Healing Cutting Mat
Also optional, but handy to ensure tape, die, and coupler are all centered. I already had one for building model terrain and such. -
Petroleum jelly
I've tried applying mold release instead, but it's hard to get good coverage without accidentally getting it on the exposed die faces. -
Platinum silicone, T20 Hardness
Platinum-based silcione does not bond to plastic, which makes it ideal for both the PVC couplers and the resin. I use Smooth-On Mold Star 20T. -
Epoxy Resin
I prefer Janchun Clear Epoxy Resin because of its work time, price, and no VOCs. -
Infrared Thermometer
Useful for keeping an eye on the resin's endothermic reaction while it's curing. -
Long-Necked Lighter
Pop bubbles on the surface of resin without burning your thumb. -
Alcohol Inks, Mica Powders, Foil, etc
What you like for adding to your dice. -
Vinyl Gloves, Plastic Measuring Cups, Wide Stirring Sticks, Craft Blade, Paper Towel, etc
Basic bench tools. -
Baby Wipes
Absolutely essential for cleaning up resin, but they must contain the compound cocamidopropyl pg-dimonium chloride phosphate; not all wipes have them so check the label! No I don't know why this matters, but without it you get a sticky, cloudy residue left behind on plastic mixing cups and tools that never comes off. I buy them by the case. -
Isopropyl Alochol
For cleaning silicone and resin surfaces both. Medical wipes are handy. -
Microfiber Cloth
For cleaning dice. Like what you're supposed to use for your eyeglasses instead of your shirt.
How much silicone do you need?
For a full set of 7 molds, 550ml of silicone in total: 350ml for the base pour and 200 ml for the caps. The couplers I use are American standard, 2" internal diameter and 2.5" tall, but I only need an inch to cover the die in the base, and a bit more than half inch for the lid. When working I do my measurements in ml, though, so we'll need to convert. Since the volume of a cylinder is pi(r^2)h, and the ratio of cubic inches to ml is 16.387, for the base we need:
(3.1459 * 1in^2 * 1in) == (3.1459 * 16.387) == 51.5ml
Rounding down to 50ml and adding another 60% of that for the cap, we will need 80ml per mold. The actual amount required is somewhat less than this since it does not account for the volume of the die but it's good to have a bit extra when working. A pint unit of silicone yields about 50 cubic inches, so I should get around 10 molds per pint.
Part I: Making the Molds
I make "cap style" molds -- individual die molds with fully separate lids, or "caps" -- because the finished dice require the least amount of sanding (I am lazy and hate sanding) and because molds will wear differently. d20s always seem to wear out first, so I can replace them piecemeal and don't have to redo a full set nearly as often. I'm cheap and lazy!
Repeat these steps for each mold you'll be making.
1. Construct the Base Mold
- Apply a thin layer of petroleum jelly to the inside of a PVC coupler with your finger.
- Wipe down the master die with alcohol to remove any dust, smudges and fingerprints. Buff the sides with a microfiber cloth to dry it completely.
- Cut a 4" square piece of book-binding tape and place it sticky side up on a cutting mat. Be careful not to let dust, debris, or fingerprints touch the surface except at the corners.
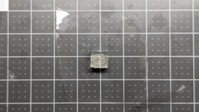
- Place the master die with the 1-side down on the center of the tape, using the grid to guide you. Do not reposition it! If it is off center, restart from step one.
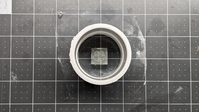
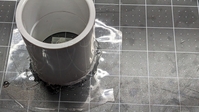
- Seal the edges of the coupler and the tape using hot glue. Do not lift the coupler from the surface of the cutting mat! The tape has to stay perfectly flat.
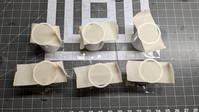
- Set the coupler aside and cover the top with masking tape or piece of paper, to prevent anything getting inside while you prepare the silicone.
2. Complete the Base Mold
- Mix the silicone according to the package directions.
- Fill the coupler with the liquid silicone; I find the little internal lip is a good target depth.
- Transfer the filled mold to the pressure pot and cure at 35psi according to package directions. The Mold Star silicone cures in 40 minutes; I give it an hour to accommodate temperature fluctuations and so on.
Don't clean up your mixing cup yet!
If you have a bit of silicone left, leave it on your desk with the pressure pot; you can check it to see when it's fully cured.
3. Construct the Cap Mold
- Remove the mold from the pressure pot. Peel off the book-binding tape and hot glue and discard.
- Carefully push the silicone out of the coupler by pushing around the edges, not the center.
- Invert the base so that the 1 face of the die is facing up. Inspect the surface to ensure it is completely flat and level with the die. If it's not, discard this silicone and start over from Step 1.
- Wipe down the surface of the mold and the exposed die face with alcohol to make sure none of the tape adhesive is clinging. Gently buff out any finger prints with a microfiber cloth.
- Using your craft blade cut small shapes, about 1/4" or so across and 1/4" deep, into the surface of the mold, three rectangles and one triangle. These are your registration keys, and will make it possible to properly align the cap with the base. Be careful to leave plenty of space between your blade and the master die!
- Apply a thin layer of petroleum jelly to the surface of the silicone using your finger tip. Go thicker in the keys. If you get any on the die, wipe it clean with alcohol, then reapply on the mold surface.
- Apply a new layer of petroleum jelly to the inside of the coupler.
- Carefully insert the base into the bottom of the coupler by pushing the coupler gently down onto the base. Ensure the base and the coupler are flush on your tabletop and perfectly level.
Go Slow, Be Perfect
The easiest way to ruin your molds is to not get perfect coverage of petroleum jelly on the surface of the base or getting it on the face of the die. Go slow, and inspect each one thoroughly before continuing!
4. Complete the Cap Mold
- Mix the silicone according to the package directions, about 60% of what you used for the base.
- Fill the coupler with the liquid silicone; ensure at least a half-inch of height above the surface of the base.
- Transfer the filled mold to the pressure pot and cure at 35psi for 1 hour as before.
- Remove the completed molds from the couplers by gently pushing on the lids with your thumb around the edges. resist the urge to pull them out from the bottom when they're loose -- you could tear a key that needs to be cut.
- Clean up the exterior of the mold with your craft blade. You can see in the before and after pictures there are often little floppy bits; your want those gone so they don't get stuck under the caps when you're casting dice, break off into the resin, etc.
- Clean the mold on all sides with alcohol to get off all the petroleum jelly.
- Clean the PVC coupler, inside and out, paper towel followed by alcohol wipes. You don't want to have to deal with this the next time you feel like making molds.
- Gently pull the lid from the mold, lifting one registration key at a time. you might need to nudge them with a knife if you didn't get jelly into every corner. Watch you don't poke the die!
- Clean both cap and base surfaces with alcohol.
- Pop the master out and give it a final wipe before putting it away.
Part II: Making Dice
Let's make some dice with the new molds. This is the only way to know if you were successful. 😃
Prepare the Resin
- Start a countdown timer for the working time of your resin. Mine is 40min.
- Mix resin according to the package directions. Amounts very according to the size of your dice; my 20mm diameter dice need around 60ml per set.
- Ready your mix-ins. In this example I split the resin into equal parts in a multi-chamber pour cup. To one half I added two drops of sapphire blue alcohol ink and two drops of black; to the other 4 drops of rose red. Both portions get 2 drops of iridescent liquid glitter.
- Once your mix-ins are done, prep your molds: clean them thoroughly if they have been used before, and do any additional prep. Here, I dust the interior of the molds with some blotches of shiny light blue mica powder.
Warm cold resin before mixing
I work in the (unheated) garage, so it can be quite chilly, which makes it hard to mix the resin. In colder months, I heat up the resin and hardener separately in a 140F water bath until they hit 90F, then mix as normal.
Cure the Dice
Depending on your pouring technique, you may need to let the resin continue to heat up in the cup before you fill the molds. When pouring multiple colors like this, I try to wait until the resin has hit at least 110F although I'm often too impatient and don't wait long enough. :D If you do need to wait, you can get a head start on cleaning up; see Clean Up, below.
- Fill your molds with the resin. Pour slowly! You only need to fill until the resin domes over the top of the mold from surface tension; any more and you're just creating more sanding work later.
- Let the resin sit in the molds uncovered as long as you can, to allow bubbles to break the surface. Pop them using your lighter.
- As close as possible to the end of the working time of your resin, carefully align the cap with the base using the registration keys, and push the cap gently but firmly down onto the base. Very little, if any, resin, should escape the sides, and there should be no gaps long the edges or under the registration keys.
- Cure in pressure pot at 35psi for at least 24 hours.
Clean Up
I use these plastic measuring cups that came with some starter set of resin or other. These are totally reusable if you clean them well.
- Clean resin tools using baby wipes containing cocamidopropyl pg-dimonium chloride phosphate.
- Rinse tools with water and dry with paper towel.
- Repeat the process for your work surfaces.
Silicone tools are even easier to clean; just wait for the resin to cure fully and then pull it off!
Dicefail?
After 24 hours, your dice will be ready to de-mold, though they will not yet be fully cured. If you're anxious to see the results of your work, you can pop them out of the molds at this stage; just be careful not to scratch the surfaces, and let them cure on your work surface at least another 24hrs before polishing.
These dice came out great, although you can see I didn't wait long enough before pouring -- the pink resin mostly disappeared. :D Under bright light you get a neat wispy effect which was not what I was going for, but! the completed dice are good enough that I won't even sand them. There is a tiny bit of flashing that will flake off under my finger once they've cured fully.
Part III: Sanding and Polishing
Coming soon...? I'm still working through the details of a final process. If I ever figure it out to my satisfaction, I'll update this guide.
Appendix: Things Wot Didn't Work
Here is a partial list of every alternative I have tried before landing on this process:
-
prefab squish molds from amazon etc. trash.
-
custom molds from etsy sellers. Awesome, recommended to start with and to have a reference. Spendy when buying repeatedly vs doing your own. Disposable. Not easily customizable.
-
sheets of 5mm acrylic hot glued into squares, putty holding the die in place. Works if you're careful, requires a lot of glue. Somewhat reusable but acrylic will scratch and mark, you have to rebuild the boxes every time, and putty lets a thin layer of silicone cure underneath it so you have to clean it up with a knife. scratched my chonky d20 master doing that.
-
acrylic boxes on packing tape. better than putty but acrylic still problematic. flimsy.
-
plastic cups with the bottom cut off glued onto packing tape, lids made by wrapping the top with packing tape. Better than acrylic sheets but hard to make lids without leaks because the cup sides aren't straight. Disposable.
-
cups, packing tape, strips of flexible cutting board sheets affixed with rubber bands / zip ties / hot glue. Better than packing tape sides, somewhat reusable, still finicky and leaky.
-
commercially-made modular silicone mold set from Let's Resin with packing tape. Works, but too big for individual molds; wastes silicone. Flimsy bottoms. Reusable.
-
slab molds (for all seven dice). Works, but tape will get floppy, and multiple sheets required creating seams and an uneven surface for the lid. More efficient than individual molds but cost of failure on a slab mold unacceptable.
-
PVC coupler on packing tape. can be used for both base and lid, but flimsy bottom and seams for my bigger dice.
-
for the lids, mold release spray vs petroleum jelly: spraying directly on surface will create cloudy surfaces on the exposed die faces. sprayed into a cup and painted onto the silicone surface with a brush is better, but leads to rough or torn edges when separating the lid unless perfectly applied. petroleum jelly slightly thicker, leading to greater chance of flashing on cured dice, but easy to apply and easy to clean and reset (alcohol wipes) if you get some on a die face.
-
packing tape: flimsy, not sticky enough, usually requires multiple sheets so creates seams. wide tape available but spendy. Book binding tape: thicker, stronger adhesive, comes in 4" width standard.
-
on silicone: T15 too flimsy; will deform dice unless you use a lot. long cure times. Cheap. T30 wears well but hard to get dice out. expensive. T20 balanced sturdiness, cost. cures in 40 minutes.
... WHICH BRINGS US TO:
- PVC couplers, with petroleum jelly, on book binding tape, sealed with hot glue, T20 Dragon Skin silicone, optionally colored with a few drops of alcohol dye (to make it easier to see edges against clear dice masters). Cheap, almost entirely reusable, repeatable, efficient.


